If you’ve just launched your beautiful new Showit website – first of all, congrats! 🎉 But now it’s time to make sure people can actually find it. One of the most important steps in that process? Submitting your sitemap to Google Search Console. Let’s walk through it together, step by step.
What Is a Sitemap (and Why It Matters)
A sitemap is a file that tells Google which pages exist on your website and how they’re organized. It helps search engines crawl your site more efficiently, especially when you’ve launched a new website or added new pages.
For Showit websites, submitting your sitemap ensures Google knows about all of your published pages so they can be indexed and appear in search results. While Google can find pages on its own over time, submitting a sitemap gives it a clearer roadmap from the start.
Step 1: Locate Your Showit Sitemap
Showit automatically creates a sitemap for you (yay for not needing to code!). Here’s how to find it:
- Go to your published Showit website (e.g.,
yourdomain.com) - Add
/siteinfo.xmlto the end of the URL- You’ll find your sitemap by going to: yourdomain.com/siteinfo.xml
This is the link you’ll submit to Google Search Console.
This sitemap updates automatically as you publish or remove pages, which means Google will always have access to the most current version of your site structure.
If your website is connected to WordPress for blogging, you may also have a separate blog sitemap generated through WordPress or your SEO plugin. Both can be submitted to Google Search Console.
Step 2: Set Up Google Search Console (if you haven’t already)
If you don’t have a Google Search Console account yet, it’s free and easy to set up:
- Head to https://search.google.com/search-console
- Click “Start now” and log in with your Google account
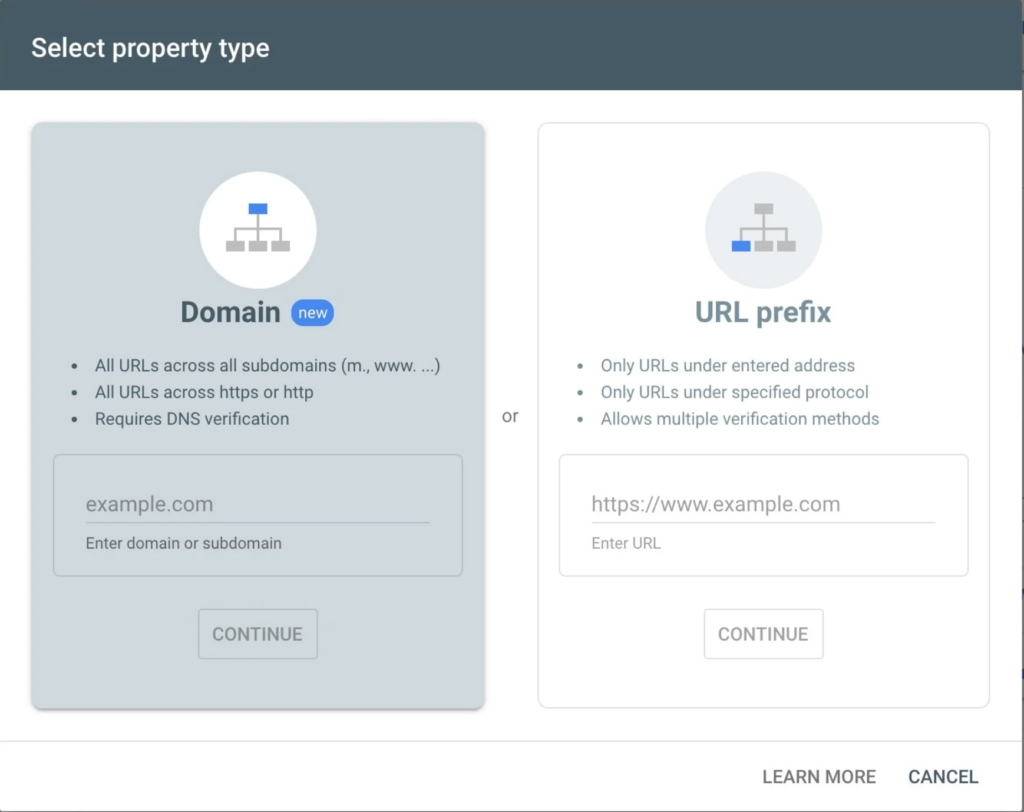
- Choose the Domain option for a more complete setup
- Follow the instructions to verify your domain (this usually involves adding a small snippet to your domain provider—like GoDaddy, Google Domains, or Squarespace)

Pro tip: If you’re already using Google Analytics, you can often verify your site in one click.
Step 3: Submit Your Showit Sitemap to Google
Once your domain is verified:
- In your Search Console dashboard, select your website property
- On the left-hand menu, click “Sitemaps”
- Under “Add a new sitemap”, paste the full url from earlier:
yourdomain.com/siteinfo.xml - Click Submit
You’re done! 🎉 Google will now start crawling your site more efficiently.
Additional Steps:
If you would like to set up a sitemap for your blog posts, you will need to submit a second URL.
A blog that is frequently updated can benefit from a sitemap so that each post can be indexed easily by the search engines. I personally use Yoast SEO which generates a blog sitemap automatically!
Your Blog Sitemap by Yoast plugin
You’ll find your Yoast sitemap for your blog by going to:
http://yourdomain.com/sitemap_index.xml (example)
(Note: Replace “yourdomain” with your domain.)
What Happens Next?
Once submitted, Google will periodically check your sitemap for updates. If you make big changes to your website (like launching new pages or reworking your structure) you don’t need to resubmit your sitemap unless you want to speed things up.
You can check back in Search Console to see if any errors pop up or how many pages have been indexed.
How to Check If Your Sitemap Was Submitted Successfully
After submitting your sitemap, Google Search Console will show its status directly within the Sitemaps section.
Look for:
- A Success status
- The number of discovered URLs
- Any warnings or errors
It’s normal for Google to take some time to process and index pages, especially on newer websites. If no errors appear, your sitemap is doing its job.
Final Thoughts (From a Designer Who’s Been There)
As a designer who works with Showit daily, I know how tempting it is to skip over the “techy” steps – but trust me, this one is worth it. Submitting your sitemap is one of the easiest (and most powerful) things you can do to boost your visibility online.
Want a website that’s not only beautiful but built with strategy and SEO in mind? That’s what I do here at Salt & Spruce Creative. Whether you’re launching a brand from scratch or giving your site a much-needed glow-up, I’m here to help you shine.
Common Sitemap Questions
Do I need to submit my sitemap more than once?
No. Once your sitemap is submitted, Google will continue to check it automatically unless you change your domain or sitemap structure.
How long does it take for Google to index my pages?
Indexing can take anywhere from a few days to several weeks, depending on your site and how often Google crawls it.
What if Google shows sitemap errors?
Minor warnings are common and don’t always require action. Coverage errors, however, should be reviewed by your web designer or SEO support.
Pin This for Later 📌

+ view the comments


